Advanced ballbar training enables shop to achieve “better than new” machine tool accuracy and extend machine life for unconventional silicon processing. Semiconductor industry supplier now understands its machine tool’s performance better than OEM service technicians. Ballbar data supports TPM and emerging SPC and OEE programs.
Ballbar testing is nothing new to those who use fleets of machine tools, including people like Wayne Ross and Jacob Hebbeler of Silfex Inc based at Eaton, Ohio, USA. Both have used ballbar analysis to maintain and enhance the accuracy of the plant’s 50+ machines for more than a decade. But, it turns out that experienced ballbar users can still learn a few new tricks that can be transformational to a business. After upgrading to a QC20-W wireless ballbar and taking Renishaw Advanced Ballbar course, TPM manager Ross and machine operator Hebbeler now use captured ballbar data to evaluate machines, super tune them to better-than-factory accuracy and get longer life out of machine components. “We’ve done ballbar testing for years, but until we took the advanced ballbar course we weren’t making full use of the results. Now we’re using the ballbar to qualify metrology, time our maintenance decisions, implement TPM and SPC, and even forecast machine life. It’s helping us make operational and capital equipment decisions in ways we never thought possible.”
Unconventional processing with conventional equipment
Silfex’s machining application is like a military proving ground for machine tools, so machine diagnostics are a way of life. Its lathes and VMCs primarily Haas and Mazak use diamond tooling to grind and polish silicon and quartz for the semiconductor industry, resulting in glass-like debris and diamond particles forming an abrasive compound that wears out components in months. The 290 employee company is a rapidly growing division of Lam Research Corporation and has built a reputation as a premier single-source supplier of electrodes and silicon fixturing for Lam plasma etching chambers. These consumable parts support the etching process in the manufacture of computer chips, and part values can be as high as $30,000.
“We are one of the few companies in the world that can grow defect-free, single-crystal silicon to a diameter of 460 mm. We do start to finish manufacturing under one roof, which is important because the semi conductor industry requires 100 percent traceability on everything from the material source to the machined parts, and we have all of that under direct control,” added Ross. For our customers’ requirements, this is a purchasing manager’s dream commented Ross.
The plant is environmentally controlled and equipped with multiple clean rooms from class 10,000 to 100. “One speck of contamination can wipe out a lot of computer chips,” Ross stressed.
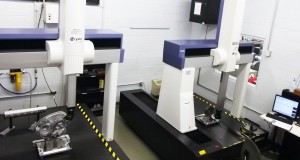
Processing the silicon includes wire sawing, waterjet cutting, milling, drilling, grinding and lap polishing before inspection in metrology rooms with CMM and VCMM equipment. Parts then go to an on-site clean room for packaging. Production runs range from five to 100 pieces per setup and the required tolerances are typically ±0.001”, with some requiring ±0.0005”.
Grinding silicon creates an extremely harsh machining environment. “We’re using conventional machines to do unconventional processing, and using ballbar diagnostics to stay on top of our machine capability in a high-wear application,” said Ross. The advanced ballbar training showed us how to determine if we can make machine adjustments or if it’s time to replace the ballscrews. This allows us to control downtime scheduling and maintain our accuracy as machine components wear out, rather than judging machine capability from the quality of finished parts.
Accuracy now starts at ground level
Silfex uses ballbar diagnostics to determine a machine’s squareness, which is the prerequisite for analyzing backlash and reversal spikes. “Many machine shops overlook the effects of the floor, as we were, on machine level, We are lucky our concrete is substantial enough to support all the weight we put on it, and we check and adjust the machine level upon installation. Once we set the level we can diagnose reversal spikes, backlash and scaling mismatch, which we didn’t know how to do before the class,” said Ross.
Based on their success with the ballbar, Ross and Hebbeler are expanding their machine diagnostics. “The ballbar tells us about the foundation the linear guides, the ballscrews and the truss bearings – the bottom end of the machine – that’s where mechanical tolerances are established and it also confirms our metrology. We’ve also started using some vibration analysis, and that tells us about the top-end of the machine which dictates finish. So, between the two, we are analyzing all the factors that affect our size and finish. We’d like to get into volumetric compensation testing with the ballbar. We currently test X and Y on VMCs, and X and Z on the lathes and have done full Y-Z testing in the past on a few machines but with volumetric testing we’ll also hit X-Z and I think we’ll be able to get what we need in the 220-degree sweep the ballbar is capable of performing.”
No wire, no worry
Upgrading to the wireless ballbar simplified data collection, and made it safer, Hebbeler explained. “With the wired ballbar, I spent a lot of time babysitting a machine under test. I had to feed wire in through the back of the machine, and if I walked away for a few minutes I often came back to a twisted wire. I always had a nagging thought that any little tug on a wire during a test might skew the results. We don’t have those issues with wireless operation. I can set it up and go do something else until the test is complete. It’s also safer now that we’ve eliminated open-door testing.”
Ballbar data opens doors for new programs
Silfex is now using ballbar data to establish thresholds in relation to its various processes and determine process capability. “We now have diagnostics to back up what we think is happening with our machines. This data is being used for our TPM program, implementation of SPC and our future OEE (Overall Equipment Effectiveness) monitoring. Full SPC will allow us to move away from 100 percent inspection. We are also working to determine what will be the useful life of a machine based on capability, maintenance costs and consistent quality,” opined Ross.
The data generated through ballbar analysis has even found its way to the company’s C-suite. “The executives at corporate now want to see a ballbar report every time a machine is qualified,” said Hebbeler. “This is filed with the machine documentation as part of our regular procedures between here and headquarters. Manufacturing keeps raising the bar and ballbar analysis helps us reach higher.The world revolves around numbers and ballbar analysis is our magnifying glass to help make good business decisions,” concluded Ross.





Leave a Reply